
IKEA Kitchen Cost Estimator
Kitchen Specifications
Service & Installation
Planning a kitchen renovation often feels like trying to solve a puzzle while blindfolded. You have measurements that don't quite match, cabinets that look great in photos but might not fit your space, and a budget that shrinks faster than you can say "granite countertops." One of the first questions homeowners ask when considering an IKEA kitchen is whether their planning tool costs money. The short answer is yes, IKEA kitchen planner is completely free to use. There are no hidden fees, no subscription models, and no premium tiers for basic functionality.
This accessibility is one of the reasons why so many people turn to IKEA for their kitchen projects. Unlike some high-end design firms that charge thousands just for a consultation, IKEA gives you the tools to do the heavy lifting yourself. Of course, if you need professional help later, they offer paid services, but getting started with the digital planner requires nothing more than a web browser and a bit of time. While most people stay focused on home improvement tasks, others might be looking into different types of directories for various needs, such as this resource for those traveling abroad.
What Is the IKEA Kitchen Planner?
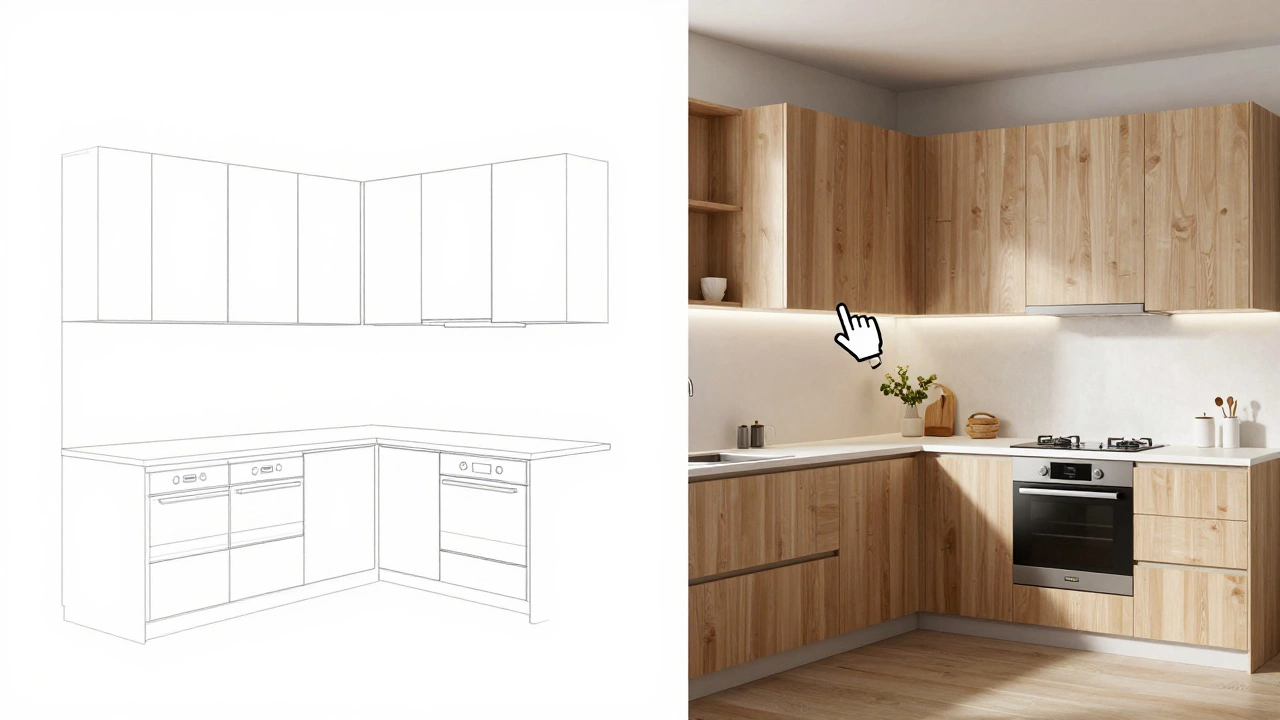
The IKEA Kitchen Planner, officially known as Metodi, is a cloud-based 3D design tool developed by IKEA to help customers visualize and configure their kitchen layouts. Think of it as a simplified version of professional architectural software, stripped down to focus specifically on IKEA products. It runs directly in your web browser, which means you don't need to download any bulky programs or worry about your computer's processing power.
When you open Metodi, you're greeted with a blank canvas where you can draw your room's outline. From there, you can add walls, windows, doors, and appliances. The tool then lets you drag and drop IKEA kitchen components-cabinets, drawers, countertops, sinks, and hardware-into your virtual space. As you place these items, the software automatically calculates dimensions and checks for conflicts, ensuring that drawers won't hit ovens and that doors will actually swing open.
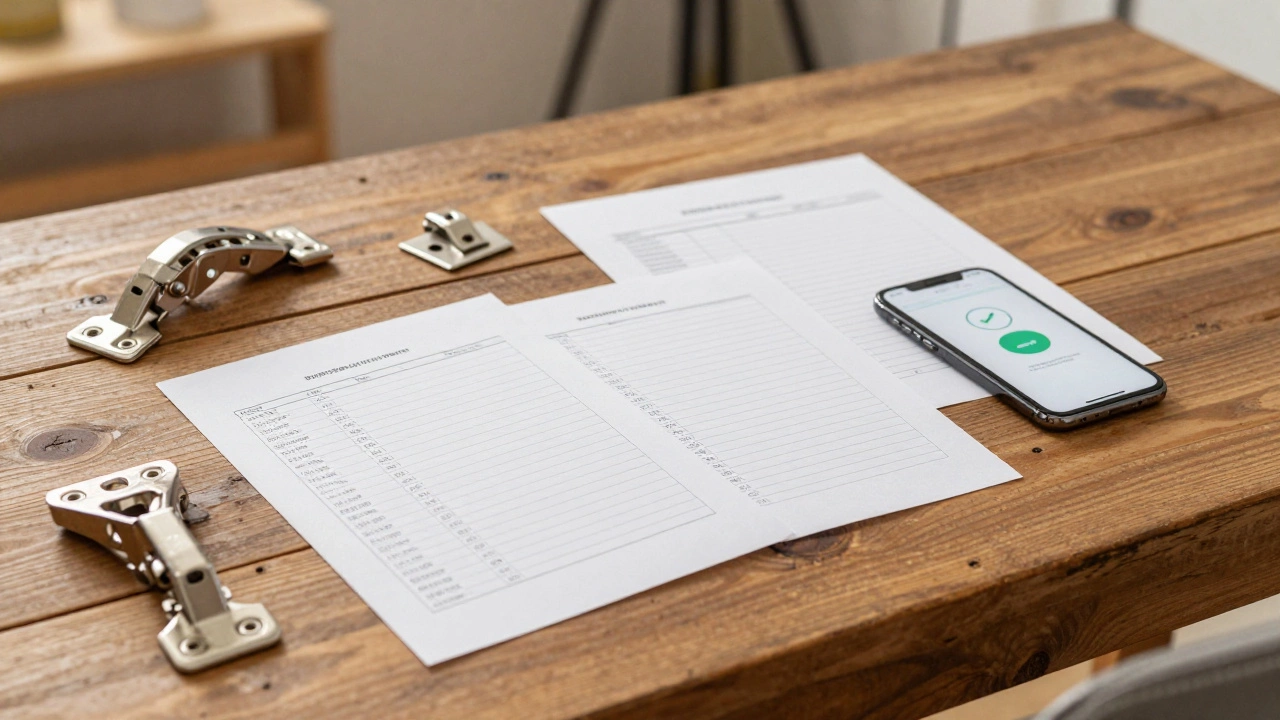
The real magic happens when you generate the shopping list. Once your design is complete, Metodi produces a detailed bill of materials that includes every screw, hinge, and panel needed for installation. This list syncs directly with IKEA's inventory system, telling you exactly what's in stock at your local store. For DIYers, this feature alone saves hours of head-scratching and multiple trips to the warehouse.
How to Get Started with the Planner
Using the IKEA Kitchen Planner doesn't require a degree in interior design. Here’s a step-by-step approach to get you from zero to a finished layout:
- Measure Your Space: Before you even open the software, grab a tape measure. Record the length, width, and height of your kitchen. Note the location of windows, doors, electrical outlets, and plumbing fixtures. Precision here prevents headaches later.
- Create an Account: Visit the IKEA website and sign up for a free account. This allows you to save your progress and access your designs from any device.
- Draw Your Room: Input your measurements into the planner. The tool will create a 2D floor plan that you can rotate and zoom. Add structural elements like pillars or non-movable appliances.
- Add Cabinets and Drawers: Browse the catalog within the tool. Drag standard cabinets onto your counters. Adjust heights and widths to fit your space. Remember to consider workflow-the classic "kitchen triangle" between the sink, stove, and fridge still applies.
- Insert Appliances: Place your refrigerator, dishwasher, oven, and cooktop. The planner ensures these items align correctly with cabinet frames and leave adequate clearance for ventilation and door swings.
- Choose Finishes and Hardware: Select countertop materials, backsplashes, and drawer pulls. These details define the aesthetic of your kitchen.
- Generate the List: When satisfied, click to generate your project list. Review it carefully for completeness.
Free vs. Paid Services: What You Need to Know
While the digital planner is free, IKEA does offer paid professional services for those who want extra support. Understanding the difference helps you decide how much help you actually need.
| Feature | Digital Planner (Metodi) | In-Store Consultation | Professional Installation |
|---|---|---|---|
| Cost | Free | Varies by region (often free with purchase) | Paid (hourly or fixed rate) |
| Access | 24/7 online | By appointment | Scheduled after design approval |
| Customization Level | Limited to IKEA catalog | Expert advice on layout and style | Physical assembly and leveling |
| Best For | DIY enthusiasts, tight budgets | Complex layouts, indecisive shoppers | Non-DIYers, complex installations |
The in-store consultation is particularly valuable if you're working with an awkwardly shaped room or have specific accessibility needs. Designers can spot issues that aren't obvious in 3D renderings, like sightlines or traffic flow bottlenecks. However, for straightforward rectangular kitchens, the digital tool is usually sufficient.
Pros and Cons of Using the Digital Planner
Like any tool, the IKEA Kitchen Planner has strengths and weaknesses. Being aware of them helps you manage expectations.
Pros:
- Real-Time Pricing: See the cost of your kitchen update instantly as you add items.
- Inventory Check: Know immediately if a product is available locally or needs to be ordered.
- Visual Clarity: 3D views help you judge scale and color combinations before buying.
- Error Reduction: The software flags impossible configurations, reducing waste.
Cons:
- Learning Curve: It takes time to master the interface and understand cabinet sizing rules.
- Limited Customization: You can only use IKEA products. If you mix brands, the planner won't account for them.
- No Structural Advice: It doesn't advise on moving load-bearing walls or major plumbing changes.
- Browser Dependency: Requires a stable internet connection and a modern browser.
Tips for Success with Your Kitchen Design
To get the most out of the free planner, keep these practical tips in mind:
Start Simple: Don't try to design the perfect kitchen in one sitting. Begin with the main cabinetry and appliances, then layer in details like lighting and decor. Complex designs take longer to render and can become overwhelming.
Consider Workflow: Arrange your workspace around the "work triangle." Keep frequently used items within easy reach. Place the sink near the dishwasher and the fridge close to the prep area. The planner lets you move items easily, so experiment until the flow feels natural.
Check Clearances: Ensure there's enough space between opposing counters for comfortable movement. Standard walkways should be at least 36 inches wide, though 42 inches is better for two people. The planner highlights collisions, but double-check manually.
Lighting Matters: Don't forget under-cabinet lighting and pendant lights over islands. While the planner focuses on structure, adding light sources in your sketch helps visualize ambiance.
Save Versions: Save multiple versions of your design as you iterate. You might love one layout for storage and another for aesthetics. Combining elements from different saves is common.
Common Mistakes to Avoid
Even with a helpful tool, pitfalls exist. Watch out for these frequent errors:
Ignoring Plumbing Constraints: Moving a sink or dishwasher far from existing pipes increases renovation costs significantly. Use the planner to test locations, but always consult a plumber before finalizing.
Overlooking Electrical Outlets: Countertops need outlets for small appliances. Plan their placement early so cords don't dangle dangerously or clash with cabinet fronts.
Choosing Trendy Colors: Kitchens last decades. Bold colors might feel fresh now but dated in five years. Stick to neutral bases for cabinets and use accessories for pops of color.
Forgetting Ventilation: Range hoods need proper ducting. Ensure your design accommodates the hood's size and vent path without interfering with upper cabinets.
Alternatives to the IKEA Planner
If the IKEA tool doesn't meet your needs, other options exist. Some are free, others paid:
- SketchUp Free: A powerful 3D modeling tool with a steep learning curve but unlimited customization.
- HomeByMe: User-friendly online planner with a large library of brands beyond IKEA.
- Cedreo: Focused on speed, good for quick visualizations.
- Planner 5D: Mobile-friendly app for designing on the go.
However, if you're committed to an IKEA kitchen, sticking with Metodi ensures accuracy in part numbers and compatibility. Mixing tools can lead to ordering errors.
Next Steps After Designing
Once your design is finalized in the planner, here’s what comes next:
- Review the Shopping List: Check for missing items like corner solutions or filler panels.
- Order Online or In-Store: Large items may require delivery coordination.
- Prepare the Space: Remove old cabinets, protect floors, and ensure utilities are accessible.
- Hire Help if Needed: Consider hiring professionals for heavy lifting or complex installations.
- Install Step-by-Step: Follow IKEA’s instructions closely. Take breaks to avoid mistakes.
Is the IKEA kitchen planner really free forever?
Yes, the core functionality of the IKEA Kitchen Planner (Metodi) is free indefinitely. There are no time limits or usage caps. You pay only for the physical products you choose to buy.
Can I use the planner for non-IKEA products?
No, the planner only includes IKEA items. While you can note dimensions for third-party products, the tool won't generate accurate lists or visuals for them. It's best used exclusively for IKEA kitchens.
Do I need special software to run the planner?
No, it runs in any modern web browser like Chrome, Firefox, or Safari. No downloads or installations are required. A stable internet connection is recommended for smooth performance.
What if I make a mistake in my design?
You can undo actions, delete items, or start over anytime. Saving multiple versions allows you to backtrack easily. Mistakes in the digital phase cost nothing; errors during installation cost money.
Can I share my design with someone else?
Yes, you can share a link to your project via email. Recipients can view the design but cannot edit it unless you grant permission through your IKEA account settings.
Does the planner include installation instructions?
The planner generates a parts list, but detailed assembly instructions come with each physical product. IKEA also offers online video guides and manuals for most items.
Is the planner available on mobile devices?
It works best on desktops or laptops due to screen size requirements. While accessible on tablets, smartphones may struggle with the interface complexity. Desktop is recommended for serious planning.
How accurate are the measurements in the planner?
Very accurate, provided you input correct initial room dimensions. The tool uses precise IKEA product data. Always verify critical measurements physically before purchasing.
Can I modify my order after placing it?
Orders can sometimes be modified before shipping. Contact IKEA customer service immediately if changes are needed. Once shipped, returns follow standard policy.
What happens if I change my mind about the design?
You can redesign freely in the planner without penalty. Only purchased items incur return fees if opened. Unopened items can typically be returned within 90 days with receipt.