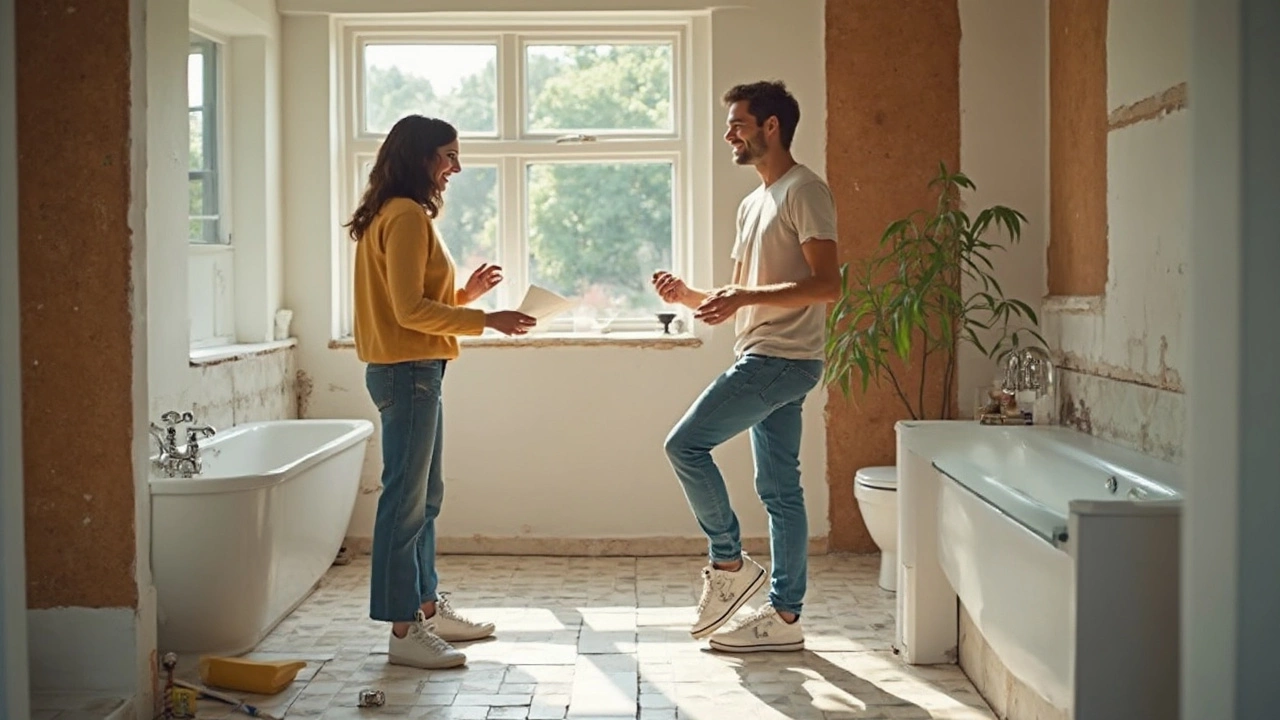
Renovating a bathroom can feel overwhelming fast. Between ripping out tiles, figuring out what’s hiding behind the drywall, and picking out the right tap, it’s easy to get lost. The real secret? There’s a proven order to follow. Get this wrong and you could end up undoing work or doubling your costs.
Start with a game plan. Measure your space and decide what you actually need to change. Are you moving pipes, or is it all cosmetic? Forgetting this step leads to surprises—like learning too late that those new cabinets won’t fit your odd-shaped wall. Even pros have messed up by skipping a simple measuring tape check.
Once your plan’s set, don’t jump straight to the fun stuff like picking tiles. There’s a reason the pros knock it all down to the bare bones first. This not only gives you a blank slate, but also lets you spot leaks or dodgy electrics hiding under the surface. A lot of people don’t realize you need to sort out behind-the-scenes stuff before thinking about those fancy fixtures.
- Planning and Prep Work
- Demolition: Out With the Old
- Plumbing and Electrical First Fix
- Walls, Floors, and Tiling
- Fixtures, Fittings, and Final Touches
Planning and Prep Work
This is the spot where loads of bathroom renos get tripped up before they even begin. Getting the planning right means less hassle down the road. Before you even swing a hammer, you need a clear plan, a realistic budget, and a timeline for when stuff gets done—and in what order. Skip this, and you might be showering in your neighbor’s house for weeks.
The first step should always be grabbing the measurements of every single part of your bathroom: walls, alcoves, doorways, even window placement. One survey reported that around 38% of people renovating made expensive mistakes just from measuring wrong. It’s almost always preventable.
- Sketch a rough floor plan—nothing fancy, just enough so you know where everything will go.
- Write out a list of all the updates: Is it just new tiles and paint, or are you rerouting pipes? Are you keeping the existing layout or moving fixtures?
- Set a budget, but leave a buffer—20% extra is standard because hidden issues always come up, especially older homes.
- Book tradies early (plumbers, sparkies, tilers) and lock in timelines. Good ones can get booked out months ahead.
- Order all the big stuff before you start—tiles, toilet, tub—since lead times can drag on and cause holdups.
If your project includes any big changes, like moving plumbing or knocking down walls, check if you need permits from your local council. Getting caught out here can halt your project cold. You might also need to organise skip bins, dust covers, and a safe spot to store new fixtures until you’re ready for them.
| Key Prep Step | Why It Matters |
|---|---|
| Accurate Measuring | Prevents costly mistakes on layout and materials |
| Up-to-date Floor Plan | Keeps trade work and fixture placement organised |
| All Materials Ordered | Avoids delays mid-renovation |
| Clear Budget With Buffer | Prepares you for surprise issues |
| Permit Check | Ensures project can proceed legally and smoothly |
Get this stage right and you’ll already be miles ahead in your bathroom renovation order. A little time measuring and planning saves piles of stress later.
Demolition: Out With the Old
Demolition might seem like the fun part, but it’s the stage where things can easily go sideways if you rush. The main goal here is to strip your bathroom down to its bones in a safe, clean way, getting rid of anything you’ll be replacing—old tiles, dated vanities, cracked tubs, and water-warped drywall. Before you even pick up a sledgehammer, always turn off the water supply and cut the electricity at the breaker. One in four DIYers forget this and end up with a puddle or, worse, a zap.
For most bathrooms, the order for bathroom renovation order during demo goes like this:
- Remove everything you don’t want: Start with shower doors, mirrors, towel racks, and light fixtures. Don’t yank—unscrew carefully to avoid wall damage.
- Take out fittings next: Faucets, sinks, toilets, and tubs. A lot of toilets still hide water in the tank, so use a shop vac and lots of towels.
- Rip up flooring and tiles: Pry off baseboards, then work your way up from the bottom. Old tile adhesive can be stubborn—use a floor scraper or chisel for stuck spots.
- Demo walls or drywall: Only remove what you need. If you’re moving pipes or wires, strip walls down to studs.
People forget about waste and dust—plan for loads of both. Rent a skip or book a large trash pickup so busted tile and old fixtures don’t pile up in your hallway all week. Wear proper safety gear: gloves, goggles, closed shoes, and a mask. According to the Home Renovation Safety Index (2023), 38% of bathroom-related injuries during renovation happen at the demo stage, mostly from sharp tile shards or slipping on wet floors.
| Item | Average Time to Remove | Pro Tip |
|---|---|---|
| Tiles (Floor & Walls) | 3–6 hours for small bathroom | Heat old adhesive with a hair dryer for easier removal |
| Toilet | 30–60 minutes | Sponge all water out before lifting |
| Vanity | 1–2 hours | Score silicone caulk lines before pulling out |
| Bathtub | 2–4 hours | Check for support brackets behind the wall |
Label any pipes or wiring as you expose them. Snap quick photos—they’ll save you headaches later. And save anything that’s in good shape: you can always reuse or donate it. Once demolished, sweep and vacuum everything. A spotless space makes the next steps way less stressful, and you’ll spot problems like leaks or rotten joists faster.
Plumbing and Electrical First Fix
This is the part where your bathroom starts to get its backbone. Before you think about putting up new walls or laying tiles, all the bathroom renovation order experts agree: sort out your pipes and wires first. Miss this step in the order and you might end up tearing open fresh walls just to fix something small. Trust me, you don’t want to re-do work you’ve already paid for (or sweated over).
First, tackle the plumbing. If you’re moving your toilet, sink, or shower to a new spot, now’s the time to reroute any pipes or add new ones. Double-check the pipe sizes and make sure the water supply and drainage lines are where they need to be. Pro tip: use new shut-off valves and flexible pipe connectors for an easier install, and always test for leaks before you cover anything up. If your home is older, look out for rusty pipes or ancient fittings—they’re often a surprise and almost always need replacing.
Next, turn to electrics. Plan out exactly where you’ll want lights, outlets, fans, and heaters. In the UK, for example, there are strict rules about where you can put outlets in relation to water sources, and electricians must follow Part P building regs. Even in the US, you need GFCI (ground fault circuit interrupter) outlets for safety reasons—these cut power if they detect a short circuit near water, and might just save your life. Tell your electrician if you’ll be adding things like underfloor heating or a heated towel rail because they’ll need their own circuits.
Don’t forget to rough in for extras like shaver sockets, LED mirror wiring, or smart shower controls, if that’s your thing. It’s a pain to try and add these once everything’s tiled up.
- Mark pipe and wire runs clearly on the studs or floor—makes life easier if you’re doing DIY or future fixes.
- Always photograph the in-wall work (piping, cables) before you close things up. You’ll thank yourself down the line.
- Arrange inspection at this stage if your local code requires it—far easier than ripping out finished work later.
Once your pipes and electrics are all tested and signed off, you’re good to move on to the next step. Think of this part as laying the tracks before the train comes through—everything else depends on getting it right.
Walls, Floors, and Tiling
Once you’ve sorted out your pipes and wires, it’s time to get your walls and floors ready. This isn’t just about making things look good; it’s about getting the surfaces prepped right, so every tile or panel you put down stays put and lasts. If you skip the prep, new tiles can start popping off, and paint will peel in no time. A common mistake is not checking the moisture levels under old floors—if there’s hidden water, the best-looking bathroom will turn into a moldy mess within months.
Here’s how to approach this step, so your "bathroom renovation order" stays on track:
- Repair and prepare surfaces: Make sure walls and floors are smooth, flat, and dry. Fix any holes, fill gaps, and sand rough spots. Use waterproof backer boards around showers and tubs, not regular drywall, since they hold up better to steam and splashes.
- Install underfloor heating (optional): If you want warm feet all year, this is the moment—right before laying any tiles or floor coverings. Once tiles are in, it’s tough (and expensive) to go back and add heat later.
- Do your waterproofing: Most leaks start where water sneaks behind tiles, especially around corners and seams. Use a reliable tanking kit (waterproofing membrane) before tiling. In some places, like Australia, waterproofing a bathroom is actually required by law.
- Lay tiles or install panels: Go slow and check everything with a level. Start at the center and work outwards for walls, but on floors, begin at the far side of the room and work towards the door. This way, you don’t tile yourself into a corner. Use plastic spacers to keep gaps even—they look small now, but crooked tiles will bug you every day you use the room.
- Grout and seal: After the tiles set (check the glue instructions—usually 24 hours), apply grout and then seal any joints, especially where tiles meet the tub or floor. Good silicone around seams keeps water out and your renovation lasting longer.
Have a look at how prep and finish steps affect bathroom life:
| Step | Average Added Lifespan (Years) | Cost if Skipped (£) |
|---|---|---|
| Waterproofing Membrane | +10 | 1,500–4,000 (water damage repairs) |
| Underfloor Heating | Lifetime | 3,000+ (retrofitting) |
| Proper Grouting & Sealing | +8 | 2,000 (mold remediation & retile) |
Splash out on the best grout and adhesives you can afford—cheap stuff breaks down, especially in steamy rooms. If your bathroom’s a tiny one, consider big tiles; you’ll have fewer grout lines, so cleaning gets easier and there’s less risk of leaks. Tile patterns matter too. For small bathrooms, laying tiles diagonally can actually make the space feel bigger, a trick backed up by interior designers. The order and the small details both add up—don’t rush this stage and you’ll thank yourself every morning.
Fixtures, Fittings, and Final Touches
This is the part most folks look forward to—actually turning your tired old bathroom into something you’re proud to show off. But there’s a sequence here, and skipping steps can mean redoing expensive work.
First up, tackle the big pieces: fit the bathtub, shower tray, and toilet. Get these locked in before you move on to anything that needs to be attached to the walls, like your vanity or heated towel rail. Even plumbers say it’s way easier to move on to the little stuff once the biggest items are settled in their places. And if you don’t want leaks, double-check your connections at this stage.
Here’s a handy order that just works:
- Install the bath or shower tray first, since these will define the rest of your layout.
- Fit the toilet and attach the cistern—make sure it’s secure and flushes right before you close anything up.
- Vanity unit or sink comes next. Check all plumbing underneath for drips before boxing things in.
- Any wall-mounted stuff (shelves, mirrors, towel rails) goes up last, as you want your walls finished and pipes hidden first.
Don’t forget about silicone—the right sealant around your bath or basin keeps water out and mold at bay. Skip it, and stats say nearly 80% of homeowners end up dealing with water damage and staining sooner or later.
Now, on to the taps, showerhead, and toilet roll holder—that’s where you can finally add your style. Chrome and black finishes have exploded in popularity the past two years, but brushed nickel is making a comeback because it hides fingerprints and water spots like a charm.
Want an eye-opener? The time you’ll spend fitting fixtures and making final tweaks often takes as long as all the earlier trades combined. It’s about getting details spot-on, and small mistakes like crooked mirrors or loose towel bars ruin the look fast.
| Item | Average Price (£) |
|---|---|
| Toilet (standard) | 130 |
| Vanity unit | 220 |
| Bathtub | 250 |
| Electric shower | 180 |
| Heated towel rail | 85 |
| Basic tap | 45 |
Finishing touches aren’t just for looks—they’re key to a reliable bathroom renovation order. Use this stage to double-check every edge, join, and handle, and you’ll save plenty of hassle down the line. If you’re aiming for high-end, soft-close hinges and anti-fog mirrors are two details that just feel good every single day. Finally, run every tap and flush a few times before you call it done. Sounds obvious, but you’d be amazed how many people forget and find out the hard way.