Ever felt like your house is closing in on you? Maybe the kitchen feels cramped, the bathroom has zero storage, or your family’s shoes take over every inch of the entryway. Here’s the thing—moving isn’t the only answer and you don’t need to commit to a full room addition either. A bump-out addition could be all it takes to fix those storage issues.
Picture this: a bump-out is basically a small extension—think a few feet pushed out from your existing wall. You get more usable space where you need it most, like an extra pantry cabinet, deeper closets, or a built-in bench with storage below. No major digging, no big-time construction. Just enough space to make a difference.
The best part? Bump-outs are one of the most budget-friendly ways to add practical square footage. You don’t mess with the bulk of your house’s structure or upset your backyard. Contractors love them because they’re faster to build, and you’ll love them because they give you exactly the extra room you need. Want a kitchen big enough for a real table or a spot to stash the vacuum? A bump-out’s a smarter move than you might think.
- What Is a Bump-Out Addition?
- Best Spots for a Bump-Out
- How Bump-Outs Tackle Storage Problems
- Tips for Planning Your Own Bump-Out
What Is a Bump-Out Addition?
A bump-out addition is like giving your home a mini makeover without the chaos of a huge remodel. It’s a small-scale extension—usually just two to eight feet pushed out from an exterior wall. This is nothing like a full room addition; it’s focused, targeted, and really good for solving small space problems.
What makes a bump-out addition different? For starters, most bump-outs don’t require a new foundation. Contractors often support these additions with simple cantilevered beams or a slab, which keeps costs and time down. Want a stat? On average, a bump-out costs anywhere from $5,000 to $30,000 depending on your area and what you need—way less than the price tag for building a whole new room.
Here’s what you can do with a bump-out:
- Expand your kitchen so you can fit that dream pantry or a bigger fridge.
- Add storage space in a bathroom or hallway, where clutter just seems to build up.
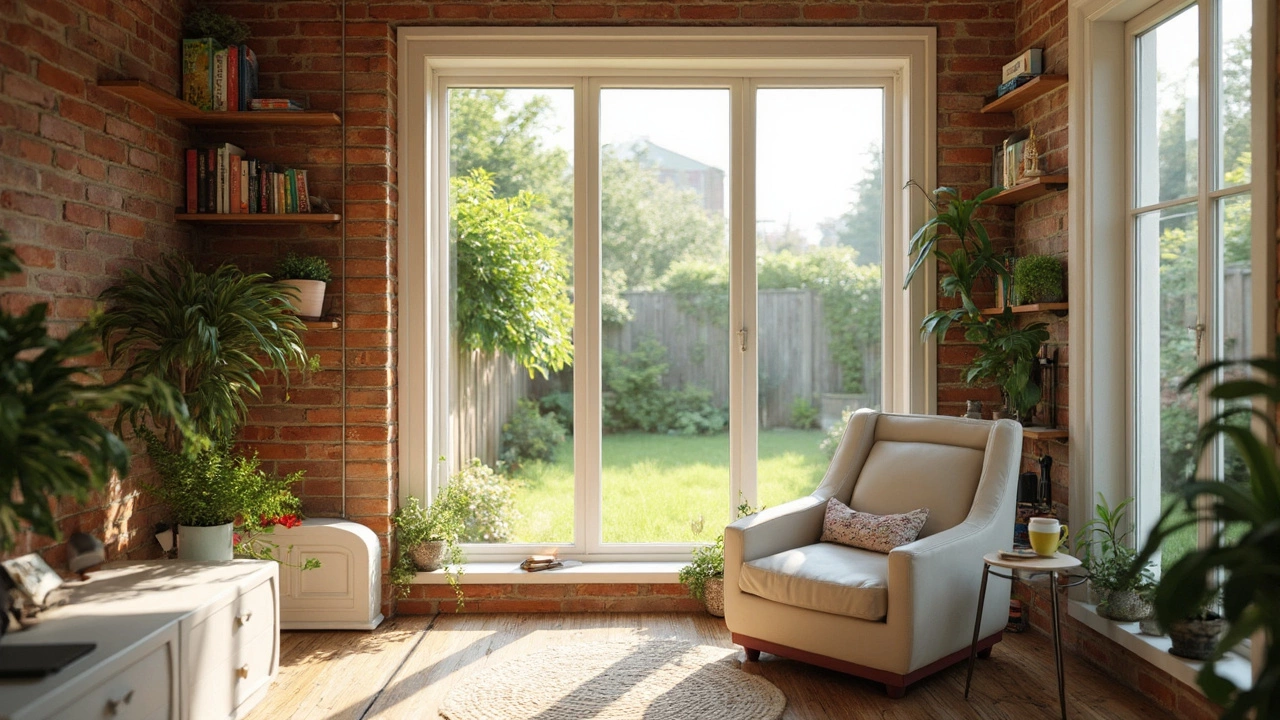
- Build out a window seat or reading nook—incredibly popular for homes built in the last 10 years.
- Add a mudroom with storage cubbies right off the entry, perfect for shoes and bags.
You don’t have to structurally change the entire house. A typical bump-out might only stretch across one part of a wall, not the whole side of a home. This keeps things simple but seriously boosts your usable square footage. Plus, because most bump-outs are under 100 square feet, many local rules don’t require tons of permits—always double-check for your city, though.
| Feature | Full Room Addition | Bump-Out Addition |
|---|---|---|
| Typical Size | Over 100 sq ft | 10–50 sq ft |
| Requires New Foundation? | Yes | Not usually |
| Average Cost | $40,000–$75,000 | $5,000–$30,000 |
| Build Time | 3–6 months | 2–6 weeks |
The bottom line? A home storage upgrade doesn’t have to wreck your budget or turn your life upside down. With a smart bump-out addition, you get the extra space where you actually need it.
Best Spots for a Bump-Out
When it comes to adding a bump-out addition, not every corner of your house is created equal. Some spots just make more sense if you want to solve those stubborn home storage problems without going overboard.
The kitchen is by far the most popular place for a bump-out. Even gaining two or three extra feet along one wall can open up room for a pantry, an eat-in breakfast nook, or deeper cabinets. According to a survey by Houzz, about 1 in 5 kitchen renovations now include some kind of bump-out—mostly to squeeze in that extra stretch of countertop or storage.
Bathrooms come next. Ever wish there was a spot for towels or to tuck away cleaning supplies? A small bathroom bump-out can make space for a linen closet or double sinks (goodbye morning traffic jams). Plus, since these are usually small (sometimes just 2-3 feet), you’re not tearing up half the house.
Bedrooms are another solid bet. If your closet just isn’t cutting it, a bump-out can create a walk-in or give you space for a built-in dresser. Sometimes the best move is adding a tiny alcove for a desk or bookshelf—perfect if you’re running out of places to stash stuff.
Here’s a quick look at the most common bump-out spots and what folks use them for:
| Room | Typical Bump-Out Use |
|---|---|
| Kitchen | Pantry, extra cabinets, breakfast nook |
| Bathroom | Linen closet, bigger shower, double vanity |
| Bedroom | Walk-in closet, built-in shelves |
| Entryway | Mudroom cubbies, shoe storage |
| Living Room | Window seat, reading nook |
Don’t forget about your entryway. Even a chunk of space for a bench or cubbies can make all the difference. One pro tip: keep an eye out for exterior walls that don’t have major pipes or vents to work around. According to remodeler Adam Levitch,
“A bump-out works best where utilities or drainage won’t get in the way—check for open space outside and a clear interior wall.”In other words, less hassle equals less cost.
If you want the project to go even smoother, focus on spots where the roofline is simple. The less you mess with the roof, the cheaper and quicker the job. Bottom line: a well-placed bump-out can unlock a surprising amount of storage—just by using space you already have.
How Bump-Outs Tackle Storage Problems
If you’re stuck with clutter and nowhere to stash your stuff, a bump-out addition just might save your sanity. These small build-outs can turn wasted space into something actually useful—without taking up your whole backyard or maxing out your budget.
Bump-outs are a game-changer for making homes more functional. Common trouble spots? Kitchens with no pantry, bathrooms with nowhere to put towels, or mudrooms swamped in coats and boots. Bump-outs give you the space that your builder probably skipped, so suddenly you can have floor-to-ceiling shelves, a deep cabinet, or even a built-in bench—right where you need it most.
| Area | Storage Solutions with Bump-Out |
|---|---|
| Kitchen | Extra pantry, bigger counters |
| Bedroom | Deep closets, storage window seats |
| Entryway | Shoe and coat cubbies, lockers |
| Bathroom | Linen closet, wider vanity |
The big deal here is flexibility. Does your kitchen table feel squeezed by the wall? A bump-out lets you add an eating nook and built-in cabinets underneath. Bathroom always chaotic? That extra two feet can fit a hidden linen closet next to the tub.
Home improvement pros swear by these projects for solving storage headaches. As home builder Tom Silva puts it,
“A bump-out is sometimes all you need to add those must-have storage solutions without turning your house into a construction zone for months.”
The process is usually way faster than a full add-on, and you rarely have to deal with major permits or the stress of moving out during construction. Most contractors agree: if built right, a bump-out can add around 30 to 50 square feet—plenty of room for storage, but small enough to keep costs down.
In short, if you need smarter storage and don’t want to knock down walls everywhere, consider a bump-out addition. It lets you tailor your home’s space to your real-life needs without the chaos or crazy expense of a bigger remodel.
Tips for Planning Your Own Bump-Out
Before you call a contractor, map out exactly what you want from your bump-out addition. A little prep goes a long way. First, decide which problem you’re actually solving—do you need home storage for shoes, pantry goods, or bathroom towels? Knowing your goal keeps you from just tacking on random square footage.
- Pinpoint Your Spot: The simplest bump-outs add a few feet to small, under-used spots—like a kitchen wall, mudroom corner, or over your garage. Pick a spot with fewer obstacles like plumbing or major wiring. You’ll save lots of hassle and money.
- Mind the Structure: Not all walls are created equal. Load-bearing walls need more work and support underneath. Non-load-bearing walls are easier and cheaper to extend, but always double-check with a pro.
- Set a Realistic Budget: Costs for a bump-out addition aren’t one-size-fits-all. On average, homeowners spend between $5,000 and $15,000 for a basic project, but costs jump if you add techy lighting, built-ins, or new windows.
- Permits Matter: Most towns make you file for building permits, even for small bump-outs. Skipping this step can cause headaches when you try to sell or if the city shows up for an inspection.
- Storage Smarts: Maximize every inch. Build-in cabinets, shelves, or even a window seat with hidden bins. If you’re really tight on space, consider multi-functional furniture or pull-out drawers.
If you want to see how these costs stack up against traditional home additions, here’s a quick look:
| Project Type | Avg. Cost per sq.ft. | Timeline |
|---|---|---|
| Bump-Out Addition | $125–$250 | 1–4 weeks |
| Full Room Addition | $200–$500 | 2–6 months |
The bottom line: focus on your needs, don’t skip the paperwork, and pack every square foot with purpose. A well-planned bump-out addition offers way more benefit for the buck compared to bigger, messier projects.