Foundation Problem Diagnosis Tool
Check Your Foundation Status
This tool helps identify if your home is experiencing foundation sinking issues based on symptoms. Select the issues you're seeing below.
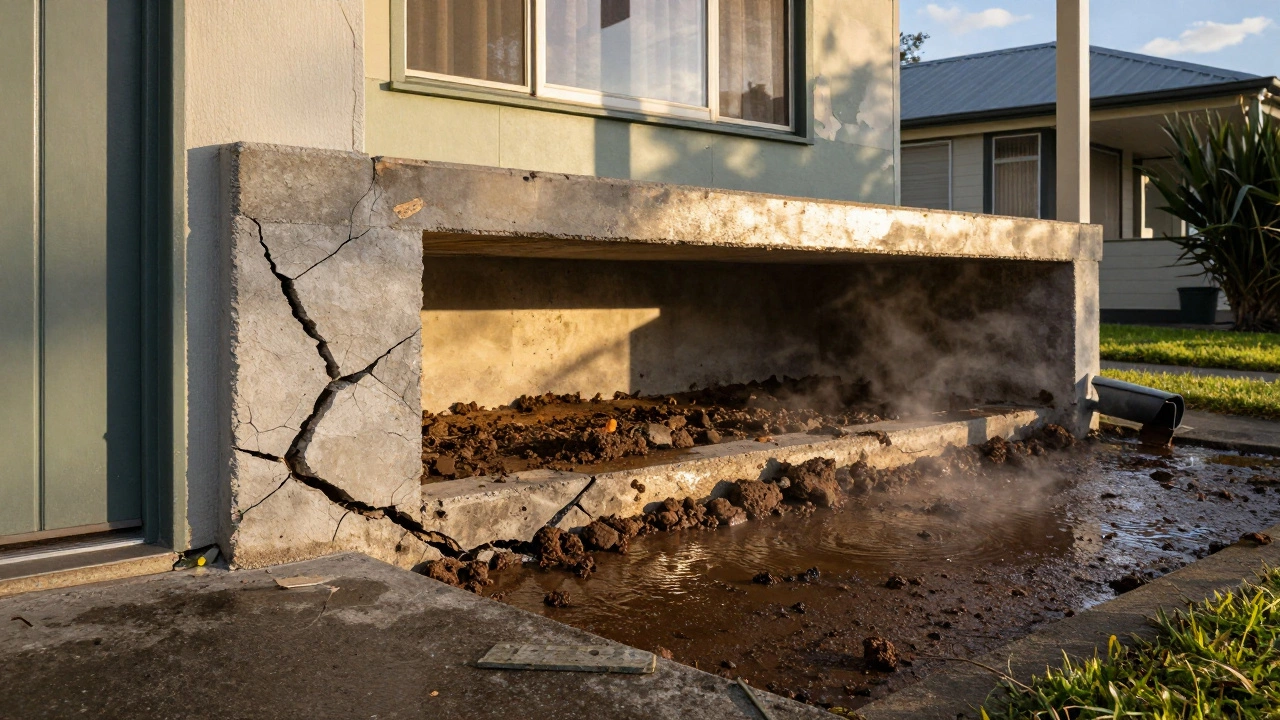
If your floors slope toward the center of the room, doors stick for no reason, or cracks are spreading along your walls, your foundation might be sinking. It’s not just an eyesore-it’s a structural emergency. In Auckland, where clay soils expand when wet and shrink in dry spells, sinking foundations aren’t rare. But they’re fixable-if you act fast and know what you’re doing.
What Causes a Foundation to Sink?
Foundations sink because the soil beneath them can’t hold the weight. It’s not always about poor construction. In New Zealand, the most common culprit is expansive clay soil. When it gets wet-like after a heavy winter rain-it swells and pushes up. When it dries out in summer, it pulls away, leaving gaps. That back-and-forth motion wears down the foundation over time.
Other causes include:
- Improper drainage around the house-water pooling near the footings
- Tree roots sucking moisture from under the slab
- Old or weak concrete that cracked under pressure
- Soil erosion from burst pipes or leaking gutters
One homeowner in Howick noticed her front door jammed shut after a particularly wet spring. She thought it was humidity. Turns out, the clay under her porch had shifted, dropping the corner by 40mm. That’s enough to break tiles, crack brickwork, and twist framing.
How to Tell If Your Foundation Is Actually Sinking
Not every crack means disaster. But these signs are red flags:
- Diagonal cracks wider than 5mm running from door or window corners
- Floors that slope more than 1 inch over 10 feet
- Doors or windows that won’t close properly, even after adjusting hinges
- Cracks in interior plaster or brickwork that keep reappearing
- Gaps between walls and ceilings, or walls and skirting boards
Use a level and a tape measure. Put the level on a floor near the center of the room. If the bubble is off-center by more than half a line, you’ve got movement. Mark the spot and check again in two weeks. If it’s changed, you’re not just dealing with settling-you’re dealing with sinking.
Step 1: Stop the Water
Before you lift anything, stop the cause. Water is the #1 reason foundations fail. Check your gutters. Are they clogged? Are downspouts dumping water right next to the house? Fix them. Extend downspouts at least 2 meters away from the foundation.
Check your yard’s slope. The ground should fall away from your house at least 20mm per meter for the first 3 meters. If it’s flat or slopes inward, regrade it. Use topsoil, not clay. Clay holds water-exactly what you don’t want near your foundation.
Inspect for leaks. A slow drip from a hot water pipe under the floor can soften soil for months before you notice. If you’ve got a concrete slab, listen for dripping sounds underfoot. Use a moisture meter on walls near the base. Anything over 18% moisture content means trouble.
Step 2: Get a Professional Assessment
Don’t guess. Hire a structural engineer or a licensed foundation specialist. In New Zealand, look for someone registered with the New Zealand Institute of Building Surveyors. They’ll use tools like laser levels, crack gauges, and soil probes to measure movement.
They’ll tell you:
- How much the foundation has dropped
- Which sections are still stable
- Whether the soil needs treatment
- If underpinning is needed
Some companies push expensive solutions. Get at least two quotes. A good report will include photos, measurements, and a clear plan-not just a sales pitch.
Step 3: Choose the Right Repair Method
There are three main ways to fix a sinking foundation. Each fits different situations.
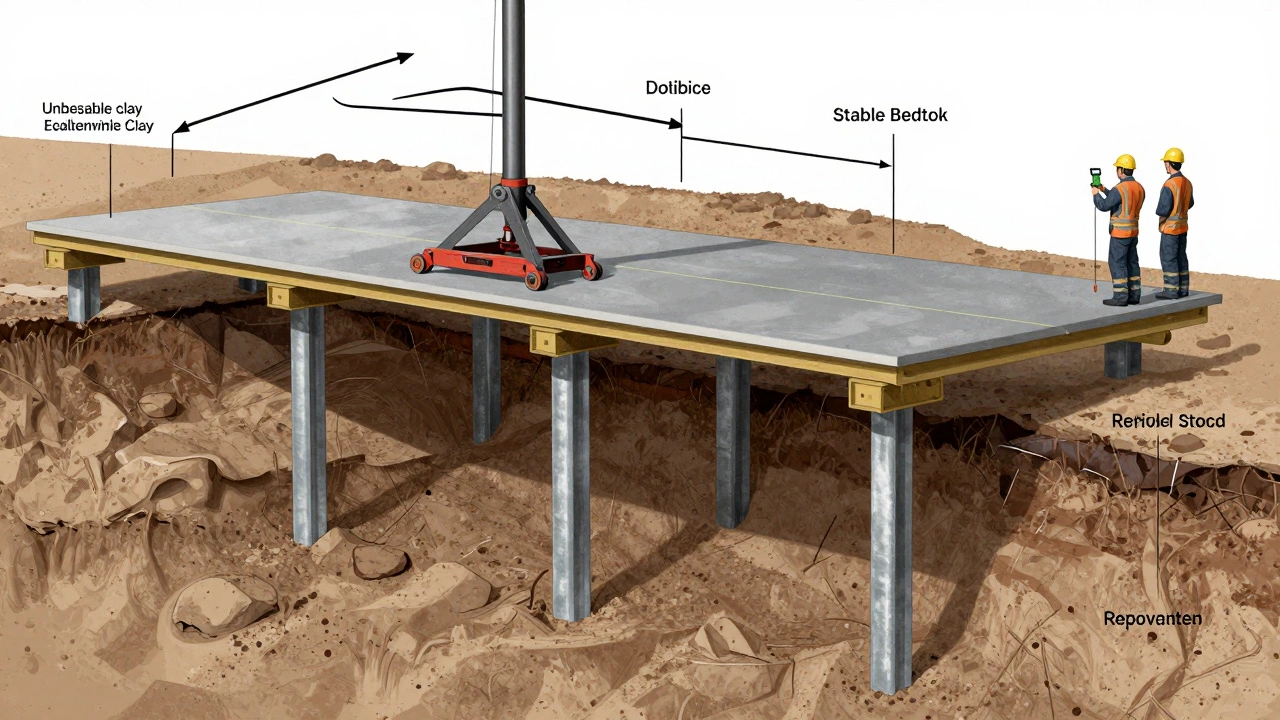
1. Concrete Piers (Most Common)
This is the go-to fix for houses on concrete slabs. Steel tubes are driven deep-past the unstable soil-until they hit bedrock or dense, load-bearing soil. Concrete is then poured into the tubes to form permanent piers. Hydraulic jacks lift the foundation back into place, then the piers are locked.
Pros:
- Long-lasting-often comes with a 25-year warranty
- Works on most soil types
- Minimal disruption to landscaping
Cons:
- Costs $3,000-$15,000 depending on house size
- Requires drilling through the slab
2. Helical Piers (For Heavier Structures)
Think of them as giant screws. Steel shafts with helical blades are twisted into the ground until they reach solid soil. They’re then connected to the foundation via steel brackets and lifted. Common for brick homes or those with basements.
Pros:
- Can be installed in tight spaces
- Works in wet or unstable soil
- Immediate load support
Cons:
- More expensive than concrete piers
- Visible steel brackets on the exterior
3. Soil Stabilization (Preventive or Minor Cases)
If the sinking is mild and caused by dry soil, contractors may inject grout or polymer foam under the slab. The foam expands, fills voids, and lifts the foundation slightly. It’s not a full lift-it’s a patch.
Pros:
- Faster and cheaper-often under $5,000
- No drilling through concrete
Cons:
- Doesn’t work if soil is actively shifting
- Not a permanent fix for major settlement
Step 4: Repair the Damage
Once the foundation is lifted, you still need to fix what’s broken.
- Cracked walls? Patch with flexible filler, then re-plaster. Don’t just paint over it.
- Broken tiles? Replace them. The underlying slab may still move slightly.
- Twisted framing? A structural carpenter may need to straighten or replace studs.
- Doors that stick? Rehang them after the foundation settles. Don’t adjust hinges until you’re sure the movement has stopped.
Wait at least 30 days after lifting before doing cosmetic repairs. The structure needs time to stabilize. Rushing this step means your new plaster will crack again.
Step 5: Prevent It From Happening Again
Fixing the foundation is only half the battle. Without ongoing care, it’ll sink again.
- Keep gutters clean every 3 months
- Install a French drain if your yard is flat
- Plant trees at least 5 meters from the house
- Water your lawn evenly-don’t let one side dry out completely
- Check for plumbing leaks every 6 months
Some homeowners in Tauranga install soil moisture sensors. They connect to a phone app and alert you if the ground under the house gets too dry or too wet. It’s not cheap, but it’s cheaper than a second repair.

What Not to Do
Don’t try to lift your foundation yourself. DIY hydraulic jacks won’t cut it. Foundations weigh tons. One wrong move and you could crack the slab further-or collapse a wall.
Don’t ignore minor cracks. A 2mm crack today can become a 20mm crack in 18 months if soil keeps shifting.
Don’t wait for insurance to cover it. Most policies don’t cover gradual settling. They only pay for sudden damage like earthquakes or burst pipes.
How Much Does It Cost?
Prices vary by house size, location, and soil type. In Auckland, here’s what you can expect in early 2026:
| Method | Cost Range | Best For |
|---|---|---|
| Soil Stabilization (Foam Injection) | $2,500-$5,000 | Minor settlement, dry soil |
| Concrete Piers | $4,500-$15,000 | Most slab homes |
| Helical Piers | $8,000-$20,000 | Brick homes, uneven ground |
| Full Underpinning | $20,000+ | Severe sinking, heritage homes |
Get a written quote. Ask what’s included: permits? Cleanup? Warranty? Some companies charge extra for removing debris or restoring garden beds.
Frequently Asked Questions
Can a sinking foundation be fixed without lifting the house?
Only in rare cases. If the sinking is very minor and caused by dry soil, injecting polymer foam can lift the slab slightly without full underpinning. But if the foundation has dropped more than 10mm, lifting is necessary. Without lifting, the structure remains unstable and will keep cracking.
How long does foundation repair take?
Most repairs take 2-5 days. Soil stabilization can be done in a day. Concrete piers take 3-4 days, including curing time. Helical piers are faster-often 2 days. But cosmetic repairs like re-plastering or retiling can add another week or two.
Will my insurance cover foundation repair?
Almost never. Standard home insurance covers sudden events like storms or earthquakes, not slow settling. If your foundation sank because of poor drainage or soil conditions, it’s considered maintenance. Some insurers offer optional coverage for subsidence, but it’s expensive and often has strict conditions.
Can I sell my house with a repaired foundation?
Yes-especially if you have documentation. Buyers and lenders want proof the repair was done properly. Keep the engineer’s report, contractor’s warranty, and photos of the work. A repaired foundation is better than an unrepaired one, but transparency is key. Hide it, and you could face legal trouble.
How do I know if the repair worked?
Monitor for 6-12 months. Use a level to check floor slope monthly. Watch for new cracks. If doors still stick or cracks reopen, the repair may not have addressed the root cause. A follow-up inspection by your engineer after a year is a good idea.
Next Steps
If you suspect your foundation is sinking, don’t wait. The longer you delay, the more damage occurs-and the more expensive the fix becomes. Start by checking your gutters and grading. Then, get a professional assessment. Most reputable companies offer free inspections.
Don’t trust the cheapest quote. Trust the one with the clearest plan, the longest warranty, and the most detailed report. A sinking foundation isn’t a DIY job. But with the right help, your home can be stable again-and stay that way for decades.